Tuesday, August 29, 2023

Solving Wordpress Critical Error on WP Admin's Login

If you get a "Critical Error" white screen when accessing your WP admin, look into the server's logs. Some hosting companies and software like CPanel make accessing logs quite an easy task.

My logs showed the following PHP error:

 [Tue Aug 29 11:53:45.667499 2023] [proxy_fcgi:error] [pid 592:tid 139914188318464] [client 1.2.3.4:0] AH01071: Got error 'PHP message: PHP Fatal error: Uncaught Error: Class "Elementor\\Core\\Schemes\\Color" not found in /home/user............quire_once('/home/user...')\n#6 /home/user/public_html/wp-admin/upgrade.php(18): require('/home/user...')\n#7 {main}\n thrown in /home/user...', referer: https://www.my.site/wp-admin/ 

The biggest challenge was to find what exactly is the path to the file which refers this "Elementor\\Core\\Schemes\\Color"  class. It appeared to be in /public_html/wp-content/mu-plugins/typography.php

I commented out all PHP content and tried to login again. This time there were no error and the WP offered me to complete the DB upgrade. Once the "Upgrade" button was pressed I instantly got the WP Dashboard back. The only thing that was left was to uncomment the code in /public_html/wp-content/mu-plugins/typography.php

Monday, June 05, 2023

Speeding up Ubuntu guest (23.04) on Windows 11 Home host with VirtualBox

I run VirtualBox v7.0.8 on an updated Windows 11 Home. 

Ubuntu 22.04 simply declined to work once installed on a VM. Even the "guest Additions" CD did not run automatically. Once Guest Addition ran manually, the VM still refused to open reasonably quickly. I tried installing 22.04 twice and then switched to the next in line.

Ubuntu 23.04 simply worked out of the box, but it had issues supporting a 4K monitor. Trying to enlarge the desktop to the full size of a 4K monitor caused blackouts. It was solved by adding more Display memory and increasing general VM RAM. 

Another glitch was that moving a window over a desktop left visual traces - copies of the same window that were living in the background forever. This issue was gone by switching "3D Acceleration" off.


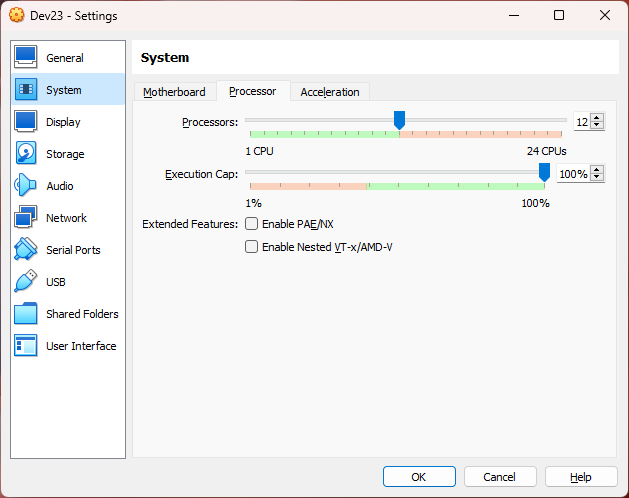
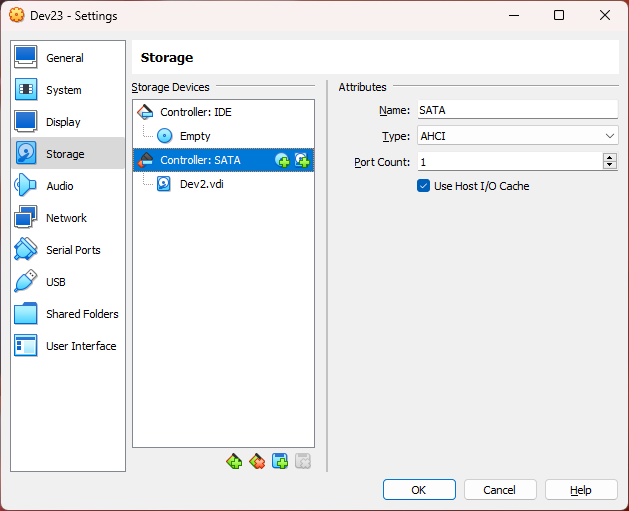
The VBox's VM settings look this way:


KVM Acceleration is selected for Linux guest


Display needs maximum RAM while "3D Acceleration" is better kept off


SATA Controller uses I/O Cache


And the disk is marked as SSD


And yet, switching off "Virtual Machine Platform" feature in Control Panel -> Programs and Features + Restart probably was one single game changer, speeding up the VM a few times.


Tuesday, September 27, 2022

AWS SAM fails on Windows 11 Home while trying to create an AWS Serverless project in PyCharm with AWS Toolkit

PyCharm shows an exception like this: 

java.lang.RuntimeException: Could not execute `sam init`!: [Cloning from https://github.com/aws/aws-sam-cli-app-templates (process may take a moment), Error: Unstable state when updating repo. Check that you have permissions to create/delete files in C:\Users\user\AppData\Roaming\AWS SAM directory or file an issue at https://github.com/aws/aws-sam-cli/issues] at software.aws.toolkits.jetbrains.services.lambda.wizard.SamInitRunner.execute$lambda-1(SamInitRunner.kt:55) 


This happens because the PATH variable on Windows 11 is limited to 260 chars (no idea why).

The fix is easy: Open Registry Editor (type "regedit" in Windows Search box)

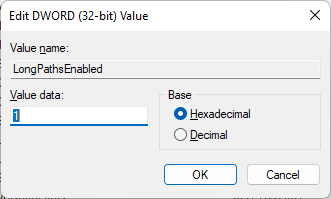
and go to HKEY_LOCAL_MACHINE\SYSTEM\CurrentControlSet\Control\FileSystem


then change the value for "LongPathsEnabled" from 0 to 1.


You need a Docker on your computer to run a Local SAM build. Install it and run Docker Desktop at least once to accept T&C's and to start the docker service.

Unfortunately, the latest v4.12.0 Docker for Windows  (as of 2022-09-27) does not work well with the latest AWS SAM 1.57.0. 
AWS SAM "Local" build throughs an error. Downgrading to Docker 4.11.1 solves this issue as discussed here.

Python 3.9 is the latest version currently supported by AWS Lambda. Assuming this is what you have selected for your AWS Lambda project, you need to make sure that SAM can find in your path python 3.9 executable' folder. SAM refuses to continue if it knows the path to e.g. python 3.10 but not to python 3.9.

Monday, August 29, 2022

Runing Ubuntu with full GUI on Windows 10 WSL

 While I did not find the way to run a full-blown ubuntu-desktop I ended up with a nice lightweight LXDE Ubuntu GUI.


If Ubuntu app is not already installed on your computer download it from Microsoft Store.

Run the app and type in the terminal:

sudo apt update

sudo apt upgrade -y

sudo apt install lxde


Now you have to install X server for Windows to make it work. Install VcXsrv freeware.

Set DISPLAY and LIBGL_ALWAYS_INDIRECT values in your Ubuntu terminal. You can later add them both to ~/.bashrc to make this change permanent:

export DISPLAY="$(grep nameserver /etc/resolv.conf | sed 's/nameserver //'):0"

export LIBGL_ALWAYS_INDIRECT=1


DISPLAY=:0 is not enough! (here is some more info) Ubuntu app and Windows have different IP addresses so we have to specify the correct IP for the X-server.


Run X-server on Windows: VcSrv installs as XLaunch. Select "One Large Window" and "Display": 0.


Keep the default "No client"


IMPORTANT: Select "Disable access control" checkbox


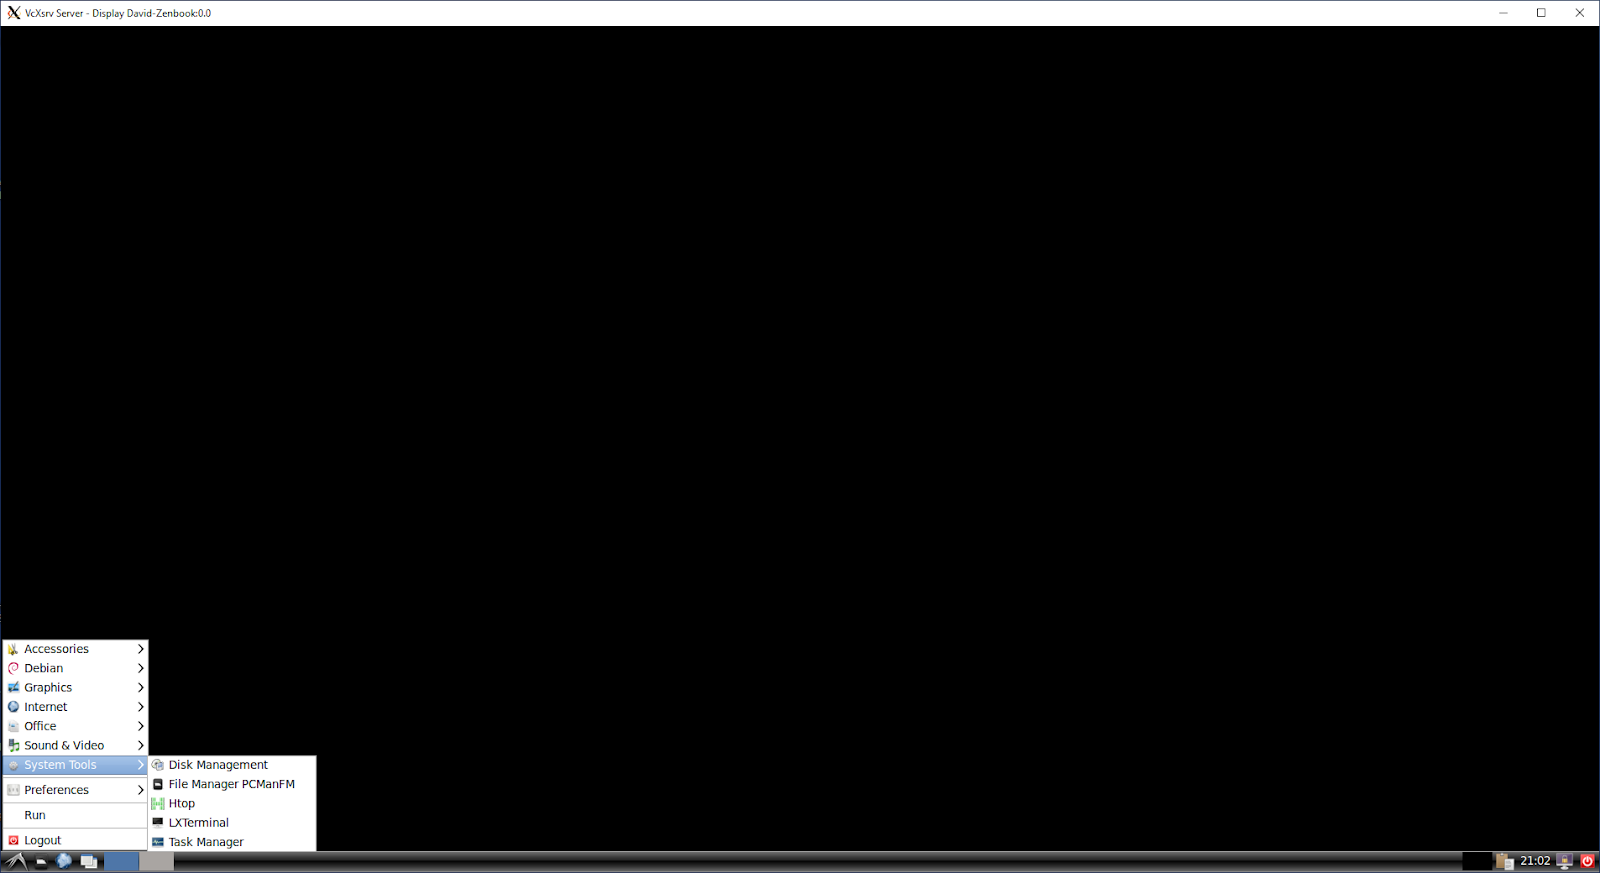
Click Next and then Finish buttons. You should get a blank window. Now in your Ubuntu terminal run:

startlxde &


You will get a "No session" dialog. It is fine, just hit "OK" button. And voila! - the full desktop appears


You can now run a terminal, Firefox, and install any Ubuntu app you want.


Thursday, June 03, 2021

Define Cloudflare DNS for a AWS S3 bucket

 It's quite a straightforward procedure if you know what to do.

1. Bucket name should exactly match your subdomain name, e.g. mycdn.mysite.com

2. Subdomains should be in one level. Buckets named like part1.mycdn.mysite.com won't work via DNS

3. Define a bucket policy granting Cloudflare servers access. See the JSON here, replace 'www.example.com' with your bucket name (mycdn.mysite.com)

4. Login to Cloudflare and in DNS section add a CNAME record:

mycdn.mysite.com => mycdn.mysite.com.s3.amazonaws.com


That's it!


Tuesday, April 28, 2020

Configure a TP-LINK router as a bridge / access point / wifi extender with a WiFi connection (not cable-connected to the main Internet router)

1. Do not touch the main router. There is nothing to configure there.

2. Cable-connect your TP-LINK router (Ethernet) to your computer and go to it's UI by typing the IP, typically 192.168.1.1 or 192.168.0.1

3. Go to Network -> LAN Settings. Change IP address to an IP which is in the LAN segment from your main router, but not in its DHCP range. E.g. if the main router / default Gateway IP is 192.168.1.1 and the DHCP range is 192.168.1.100 - 192.168.1.199 then any IP between 192.168.1.2-192.168.1.99 will do.

4. Disable DHCP server.

5. Click SAVE

6. The router is supposed to reboot. Go to DHCP server and double verify that it is disabled.

7. Go to Wireless -> Basic Settings (or whatever it is called in your model) and switch on "enable WDS". You might need to define specific channel on main router, e.g. 11 and match it on the bridging router by selecting Channel = 11. The same is correct for the Channel Width. Name your WiFi in the way you want, e.g. "my_home_NW_EXT"

8. Hit Scan / Survey button to get the list of available WiFi networks. Select the network broadcasted by your main router and hit "Connect". Enter the password for that network as defined in the main router. Note that it is NOT the password to access the new WiFi network you are defining: "my_home_NW_EXT".

9. GO to Wireless -> Wireless Security where you define the security for your new network "my_home_NW_EXT" and define the password you will use while accessing thi snetwork it could be the same password as for teh bridged network or another one.

10. Reboot the bridged router. Cross your fingers, it should work now.

Wednesday, July 06, 2016

Recovering AWS AMI with lost key pair

If you lost a key pair for the running AMI or an image here is the sequence of steps to recover (ubuntu 14.04 style):
1. For the image, run an instance IN THE SAME AZ where you need your new AMI. If you got a running AMI in another AZ make an image and start the new AMI from that in the AZ where you need your new instance.

2. Once you got a running old AMI in the AZ you need, stop it (do NOT Terminate).

3. Detach volume of the old AMI using AWS Console

4. Start a clean new AMI with the key pair you got.

5. Using AWS Console, attach the detached old AMI volume to the new AMI. AWS will tell you it is mounted at /dev/sdf - NOT SURE IT IS THERE

6. SSH to your new AMI where you attached the old volume


#become a root
sudo -i

#find out where the old volume is attached
sudo lsblk --output NAME,TYPE,SIZE,FSTYPE,MOUNTPOINT,LABEL

#it should give you something like
NAME    TYPE SIZE FSTYPE MOUNTPOINT LABEL
xvda    disk   8G                  
└─xvda1 part   8G ext4   /          cloudimg-rootfs
xvdf    disk  14G                  
└─xvdf1 part  14G ext4              cloudimg-rootfs


#create mount point
mkdir /mnt/recovery

#mount the volume - note it is /dev/xvdf1 (with "1" at the end)
mount /dev/xvdf1 /mnt/recovery -t ext4

#copy SSH keys to the old volume. NOTE you will need 'ec2-user' instead of 'ubuntu' in the below pathes if you do it for other OS-s
cat /home/ubuntu/.ssh/authorized_keys > /mnt/recovery/home/ubuntu/.ssh/authorized_keys

#unmount the volume
umount /mnt/recovery/

7. Attach the old volume back to stopped old AMI

8. Now you can kill the new instance and start the old one. You should be able to SSH it with your key pair

Alternatively to steps (7)-(8) you can create a snapshot from the old volume with new key pair, and then create an image from that snapshot. Next, launch a new AMI from that image.

References:
[1]